
Team
Your team brings together everyone who shares your organization's dAio Business workspace. This is where you invite members, assign them a role, group them, and decide which sites each person can access. A well-structured team ensures the right person receives the right alert, without flooding everyone with notifications outside their scope.
Fine-grained seat management and the associated billing are covered in Team seats.
Tip: think "least privilege needed." Give each person only the level of access they genuinely require for their work — you protect your data and simplify governance.
Roles and permissions
dAio Business distinguishes four roles, from the broadest to the most restricted. The owner is set automatically when the organization is created: it is unique and can neither be removed nor demoted. The other three roles can be assigned freely.
| Permission | Owner | Admin | Member | Viewer |
|---|---|---|---|---|
| View the dashboard and intelligence | Yes | Yes | Yes | Yes |
| Create and manage sites | Yes | Yes | No | No |
| Invite and remove members | Yes | Yes | No | No |
| Assign sites / a phone number to members | Yes | Yes | No | No |
| Create alerts | Yes | Yes | Per setting* | No |
| Manage team groups | Yes | Yes | No | No |
| Change a member's role | Yes | No | No | No |
| Manage subscription and billing | Yes | No | No | No |
| Delete the organization | Yes | No | No | No |
* Whether members can create alerts depends on an organization setting ("Members can create alerts"), which the owner or an admin can change in settings. The viewer remains read-only in all circumstances.
Tip: reserve the Admin role for a few trusted people. The Member role suits most field staff; the Viewer role suits external stakeholders (management, partner, auditor) who only need visibility.
Inviting a member
You add a colleague by email. They then receive an invitation to join the organization.
- Click Invite in the top right of the Team page.
- Enter the colleague's professional email address.
- Choose their role: Admin, Member, or Viewer. (The Owner role cannot be assigned by invitation.)
- Click Send.
The invitee receives an email localized in their language, containing a secure sign-up link. The invitation expires after 7 days; beyond that, the link stops working and you must send a new invitation.
Until it is accepted, the invitation appears in the Pending invitations section at the bottom of the page. You can withdraw it at any time using the delete icon.
Warning: if all your seats are taken, inviting an additional member may trigger billing for an extra seat. A confirmation is requested before sending. On the Enterprise plan, adding is blocked and requires contacting support. See Team seats for the details.
Accepting an invitation
For the invitee, the journey is immediate:
- They click the button in the invitation email.
- They create their professional account (or sign in with an existing professional account) using the invited address.
- Access to the organization is activated instantly, with the role assigned to them.
The invitation is single-use: once accepted, the link is consumed and can no longer be reused.
The B2B / B2C wall
dAio strictly separates the professional (B2B) workspace from the personal (B2C) workspace. A single email address cannot live in both worlds at once.
In concrete terms: you cannot invite an email address already linked to a personal dAio account. If you try, the invitation is refused with a dedicated message:
"This email corresponds to a personal dAio account. The professional (B2B) and personal (B2C) workspaces are separate: the person must use a different email address to join the organization."
This separation protects everyone's privacy: a user's private data is never mixed with the organization's data, and vice versa.
Tip: for a colleague who already uses dAio personally, ask them to join the team with their professional address. This is the recommended practice, and it also clarifies the separation of uses.
Managing an existing member
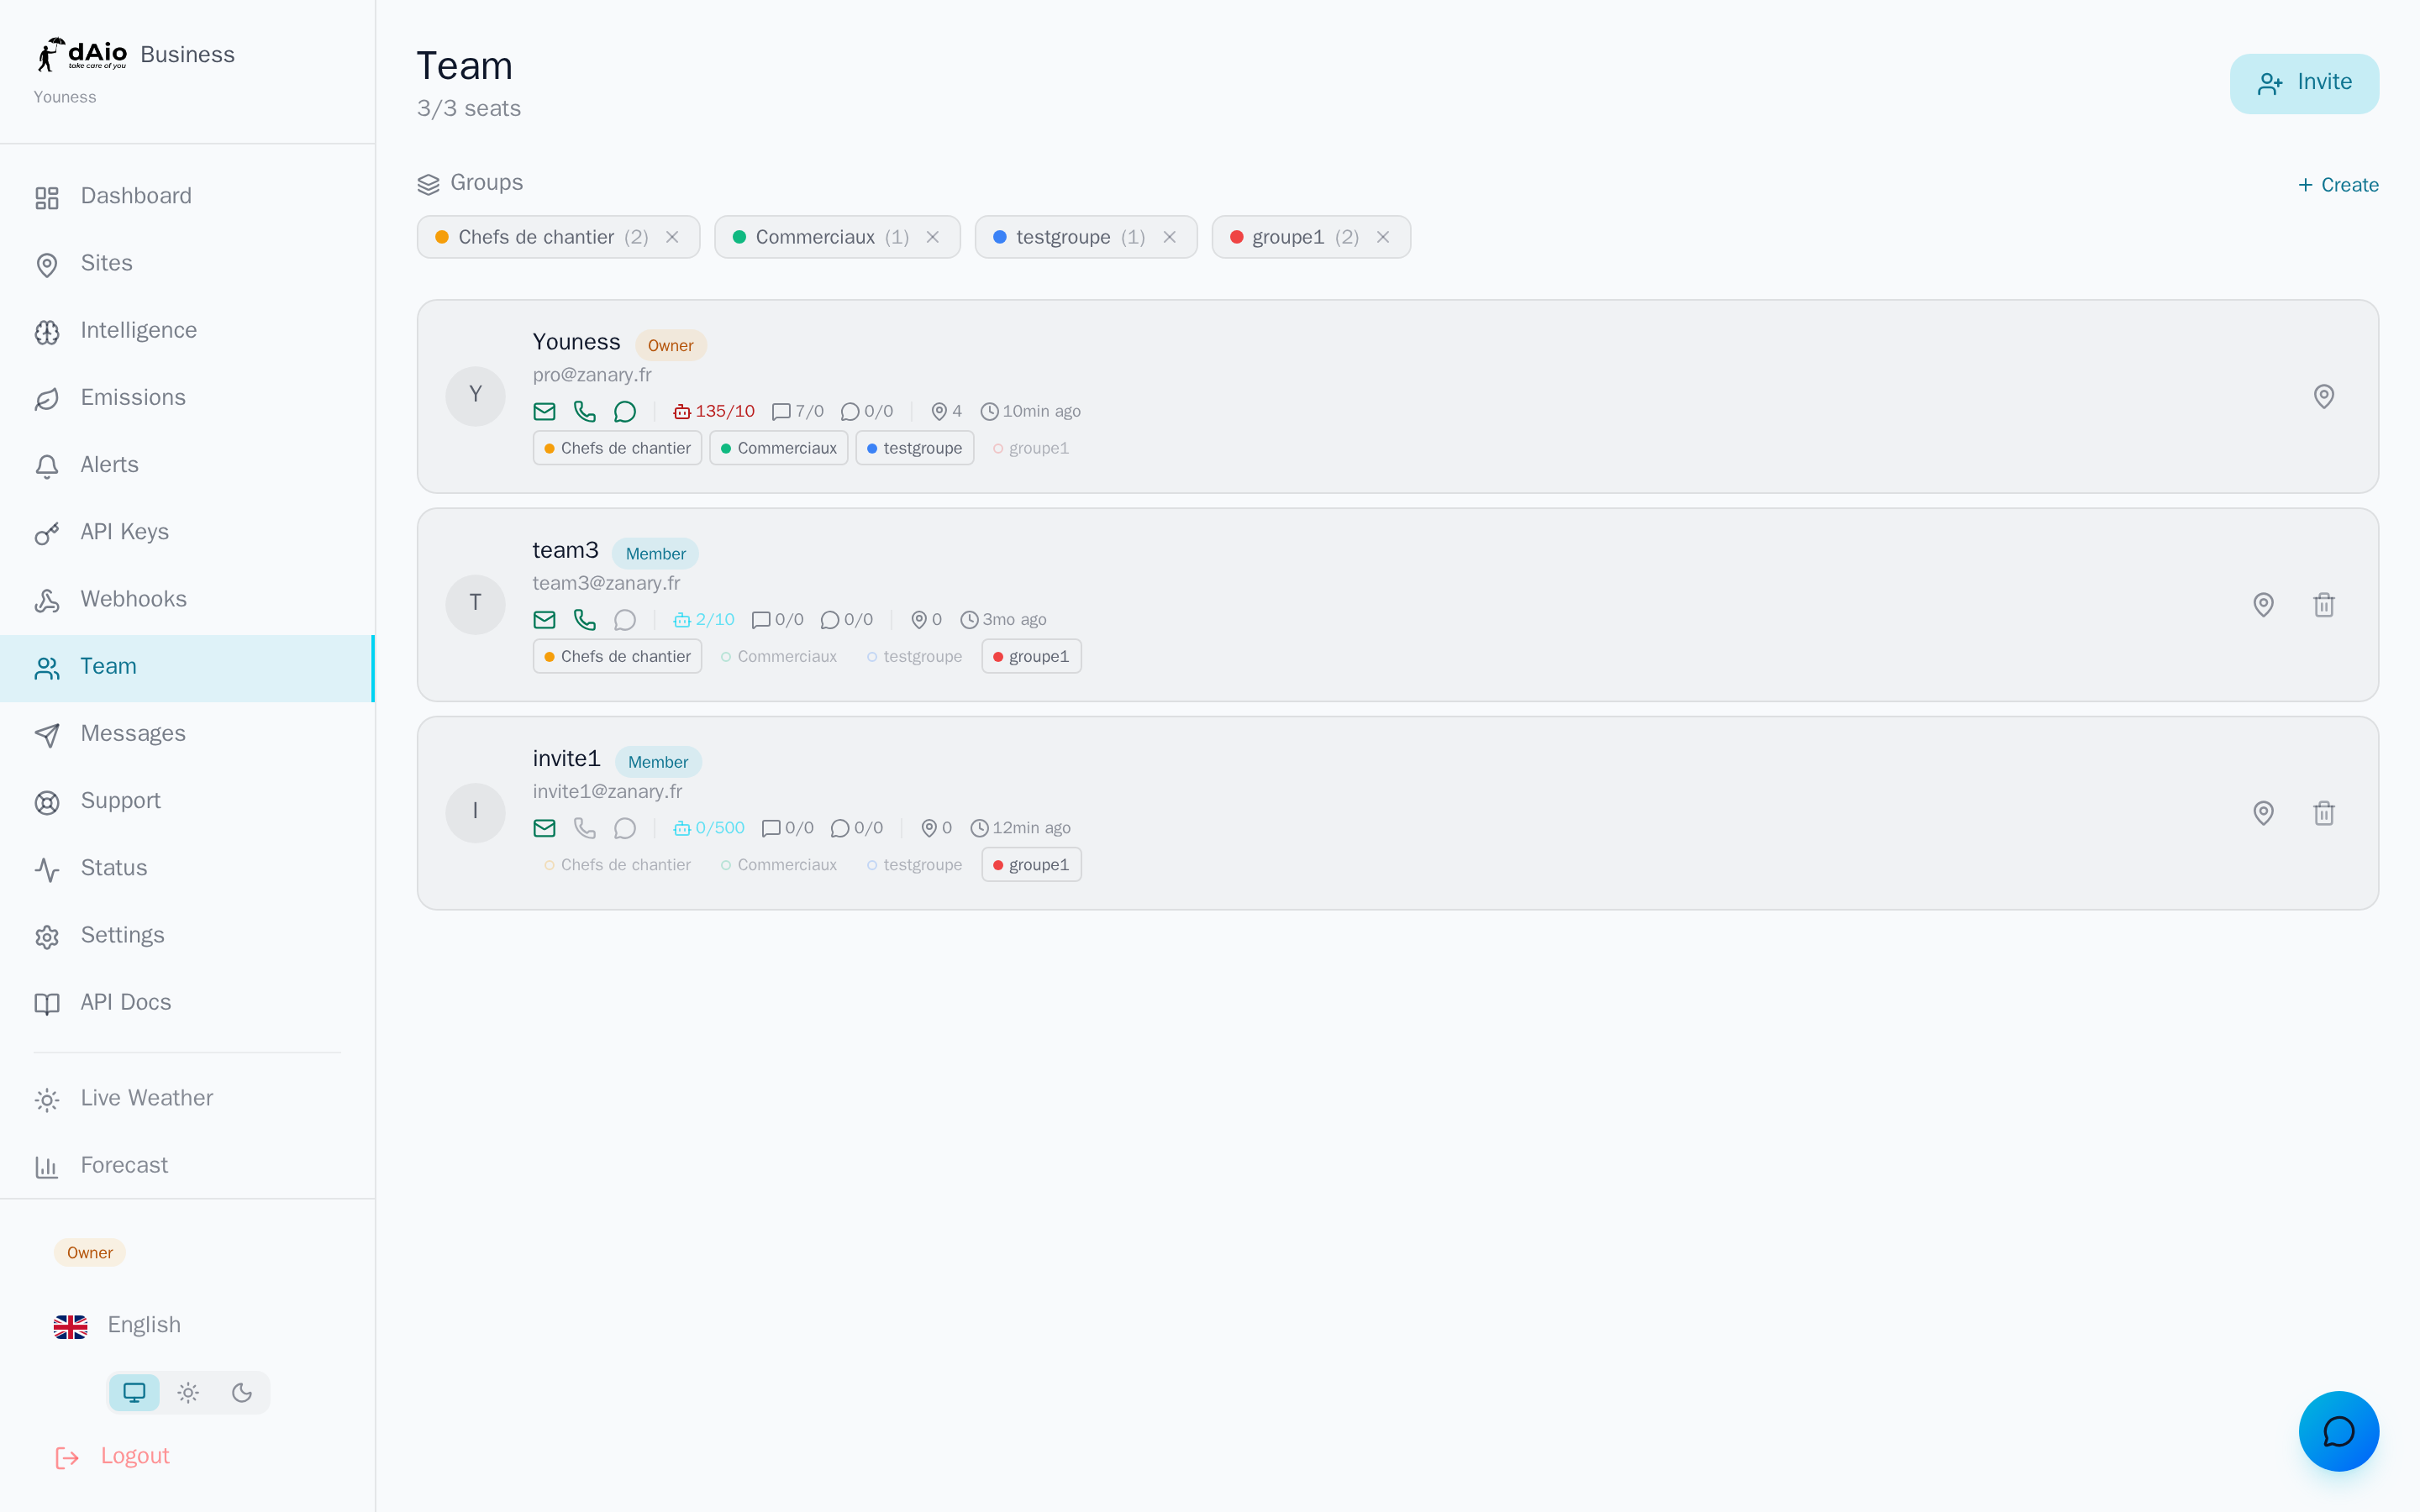
From the list of active members, each row gives access to the management actions.
Changing a role
Only the owner can change a colleague's role. The Owner role itself cannot be modified: it stays attached to the organization's creator.
Removing a member
Both the owner and an admin can remove a member. A confirmation is requested. The owner cannot be removed. If the member occupied a billed extra seat, that seat is automatically credited.
Warning: removing a member immediately cuts off their access to the organization and to all sites assigned to them. Their site assignments are deleted; their personal data, however, is not affected.
Setting a phone number
The owner or an admin can record a member's phone number directly from their profile card (phone icon). The number is then considered verified, which activates the SMS and WhatsApp channels for that colleague. The country code is detected automatically from the prefix (+33, +1, +44…).
Member card indicators
Each active member shows their operational status at a glance:
| Indicator | Meaning |
|---|---|
| Email verified or not. | |
| Phone | Number set and verified (clickable to edit). |
| WhatsApp channel connected or not. | |
| Quotas | AI, SMS, and WhatsApp usage (used / limit). |
| Sites | Number of assigned sites. |
| Last activity | Date of the last sign-in. |
Team groups
Groups gather several members under a single colored label ("Lyon Team," "Site Managers," "Management"…). They simplify targeted communication.
- In the Groups section, click Create a group.
- Give it a name and choose an identifying color.
- Add or remove members by clicking the group badge directly on each card.
A group then lets you send a message or an alert to all of its members in a single action. Deleting a group does not remove the members it contained.
Site assignment
You can restrict a site's visibility to certain members and control their notifications.
- On a member's card, open the Sites panel (pin icon).
- Select a site from the Add a site list to assign it to them.
- Toggle the bell to manage notifications for that site, member by member.
- Remove an assignment at any time using the delete icon.
- Members and viewers only see the sites explicitly assigned to them.
- The owner and admins see all sites, without restriction.
- A site's alerts go only to assigned members whose bell is active.
Tip: a member can mute notifications for their own sites themselves, but only the owner and admins can manage other people's assignments.
Governance best practices
- Apply least privilege: assign the most restricted role compatible with each person's mission, and limit the number of admins.
- Use professional addresses for all invitations — this is consistent with the B2B/B2C wall and makes offboarding easier.
- Partition by site: assign each colleague only to the sites within their scope for relevant alerts and well-segmented information.
- Structure into groups as soon as the team grows, to communicate quickly and accurately.
- Run access reviews regularly: remove inactive accounts or departures, and check that roles still reflect actual responsibilities.
- Centralize billing on the owner and track your seats to avoid surprises when inviting people.
Tip: once your team is in place, configure messages and alerts by group and by site to turn your org chart into a genuine operational information chain.