
Getting started with dAio Business
Welcome to dAio Business, the SaaS environmental intelligence platform built for organizations. Industry-grade weather, carbon footprint, predictive alerts and an API: dAio Business turns environmental data into operational decisions.
This guide walks you through every step, from creating your professional account to getting familiar with your workspace and inviting your team. Allow about ten minutes for a complete setup.
Prerequisites
Before you begin, make sure you have:
- a professional email address (see the note below about the B2B / B2C separation);
- the name of your organization (company, public body or project);
- the address or GPS coordinates of at least one site to monitor (construction site, warehouse, plot of land, point of sale, etc.);
- an up-to-date web browser.
Warning: dAio Business and the consumer app dAio Personal are two strictly separate worlds. An email address already linked to a personal dAio account cannot be reused to create a professional account. If you see the message stating that your email is already linked to a personal account, use a different email address for your professional workspace.
Step 1 — Create your professional account
- Go to the dAio Business portal and click Create an account.
- Enter your full name, your professional email and a password of at least 8 characters.
- Tick the box to accept the Terms of Use and the Privacy Policy.
- Confirm with Create my account.
Tip: choose a long, unique password. You can enable additional protections later from your security settings.
Step 2 — Verify your email
After registration, dAio Business sends you a 6-digit verification code by email.
- Open the message you received (check your spam folder if needed).
- Enter the 6-digit code on the verification page.
- If the code has expired, click Resend a code to generate a new one.
Once your address is confirmed, you reach the setup assistant.
Tip: if you are joining an existing organization through an invitation link, your account is verified automatically when you accept the invitation — you go straight to your workspace.
Step 3 — Create your organization
The organization is the central container of your dAio Business workspace: it groups your sites, your team, your alerts, your emissions data and your billing.
- Enter the name of your organization.
- Optionally select your industry: construction, logistics, agriculture, events, retail or energy. This choice is optional but it personalizes your risk scores, alerts and recommendations.
- Click Continue.
Warning: the creator of the organization becomes its Owner. This role has the most extensive rights, including billing and account deletion. It cannot be transferred without support intervention.
Step 4 — Add your first site
A site is a geographic location you want to monitor. dAio Business attaches industry-grade weather, alerts and part of the emissions calculation to it. Three methods are available:
- Address — search for an address or place; the city name is automatically translated into your interface language.
- Map — click directly on the map to position the site.
- GPS — manually enter a name, a latitude and a longitude.
Select your location, confirm, and your first site is created. You can add more at any time from the Sites section.
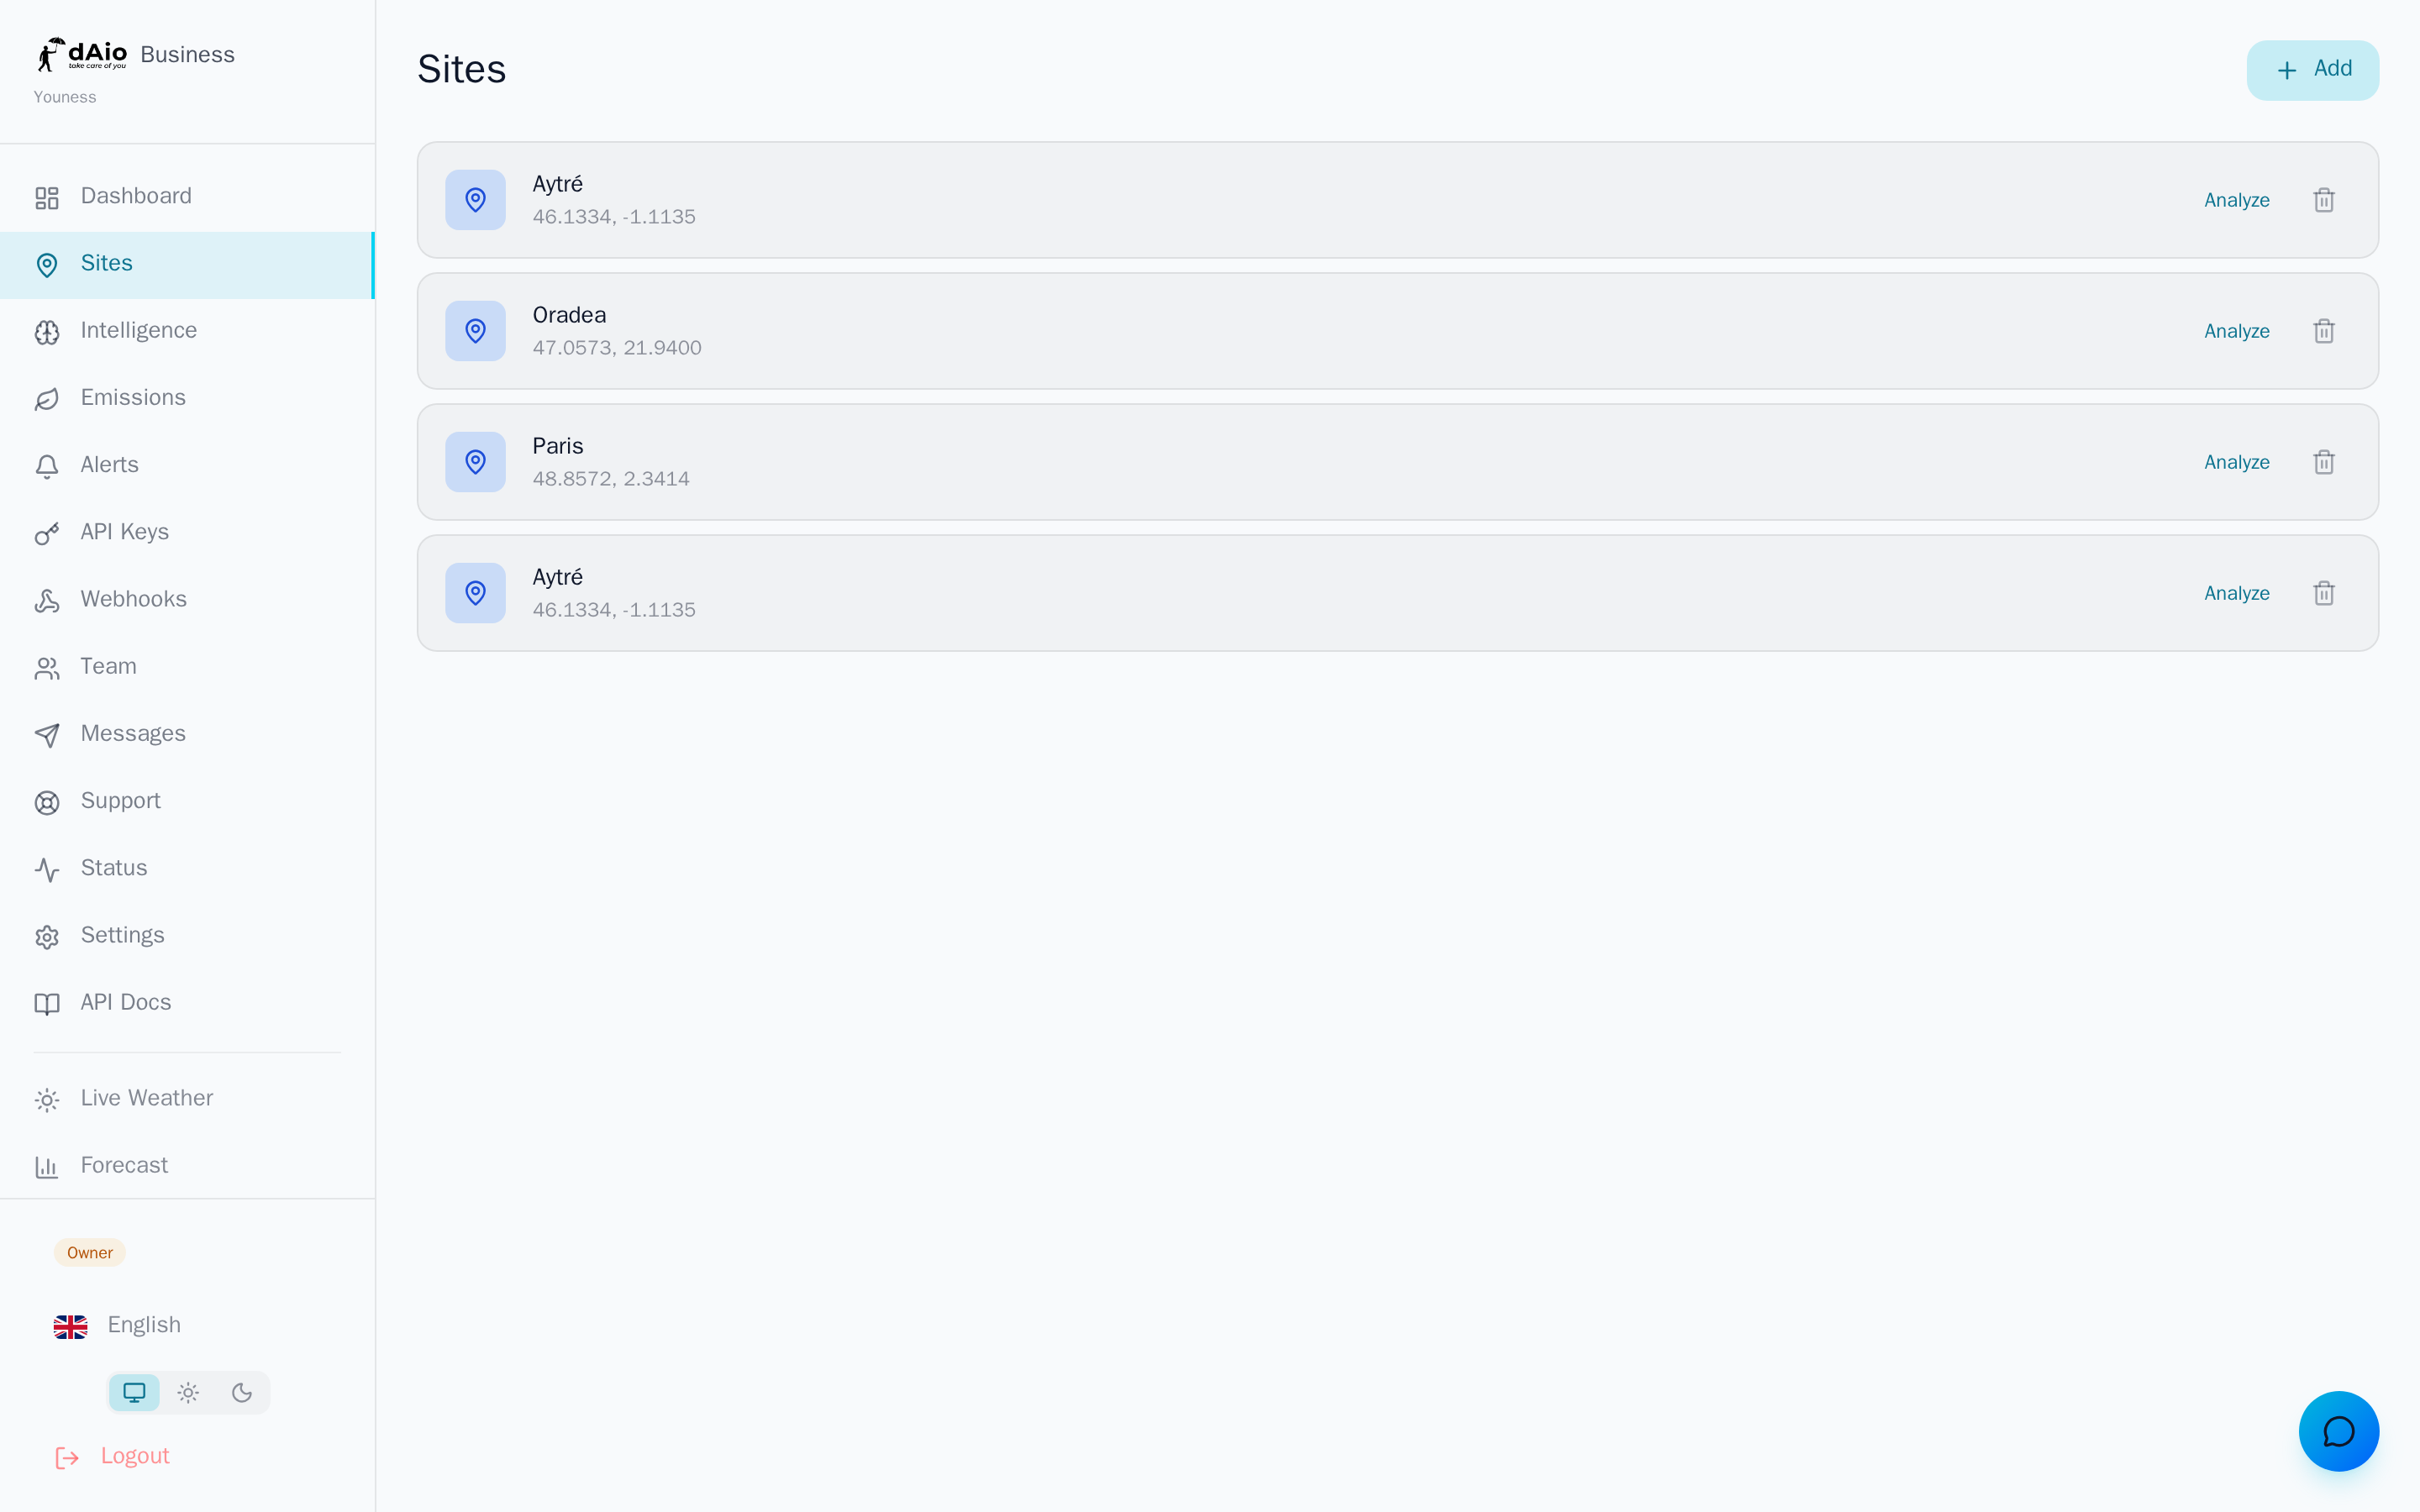
Tip: you can skip this step during onboarding and add your sites later. The number of allowed sites depends on your subscription plan.
Step 5 — Generate an API key (optional)
dAio Business exposes an API that lets you embed environmental intelligence into your own tools, scripts and automations.
- At the dedicated onboarding step, click Generate the key.
- Copy the key immediately: for security reasons, it will not be shown again.
- Store it in a secrets manager.
You can skip this step and create a key later from the API keys section. To go further, see also Webhooks.
Warning: an API key grants access to your organization. Never share it in plain text and immediately revoke any compromised key.
Step 6 — Discover your dashboard
Once setup is complete, you land on your dashboard, the daily entry point to your workspace.
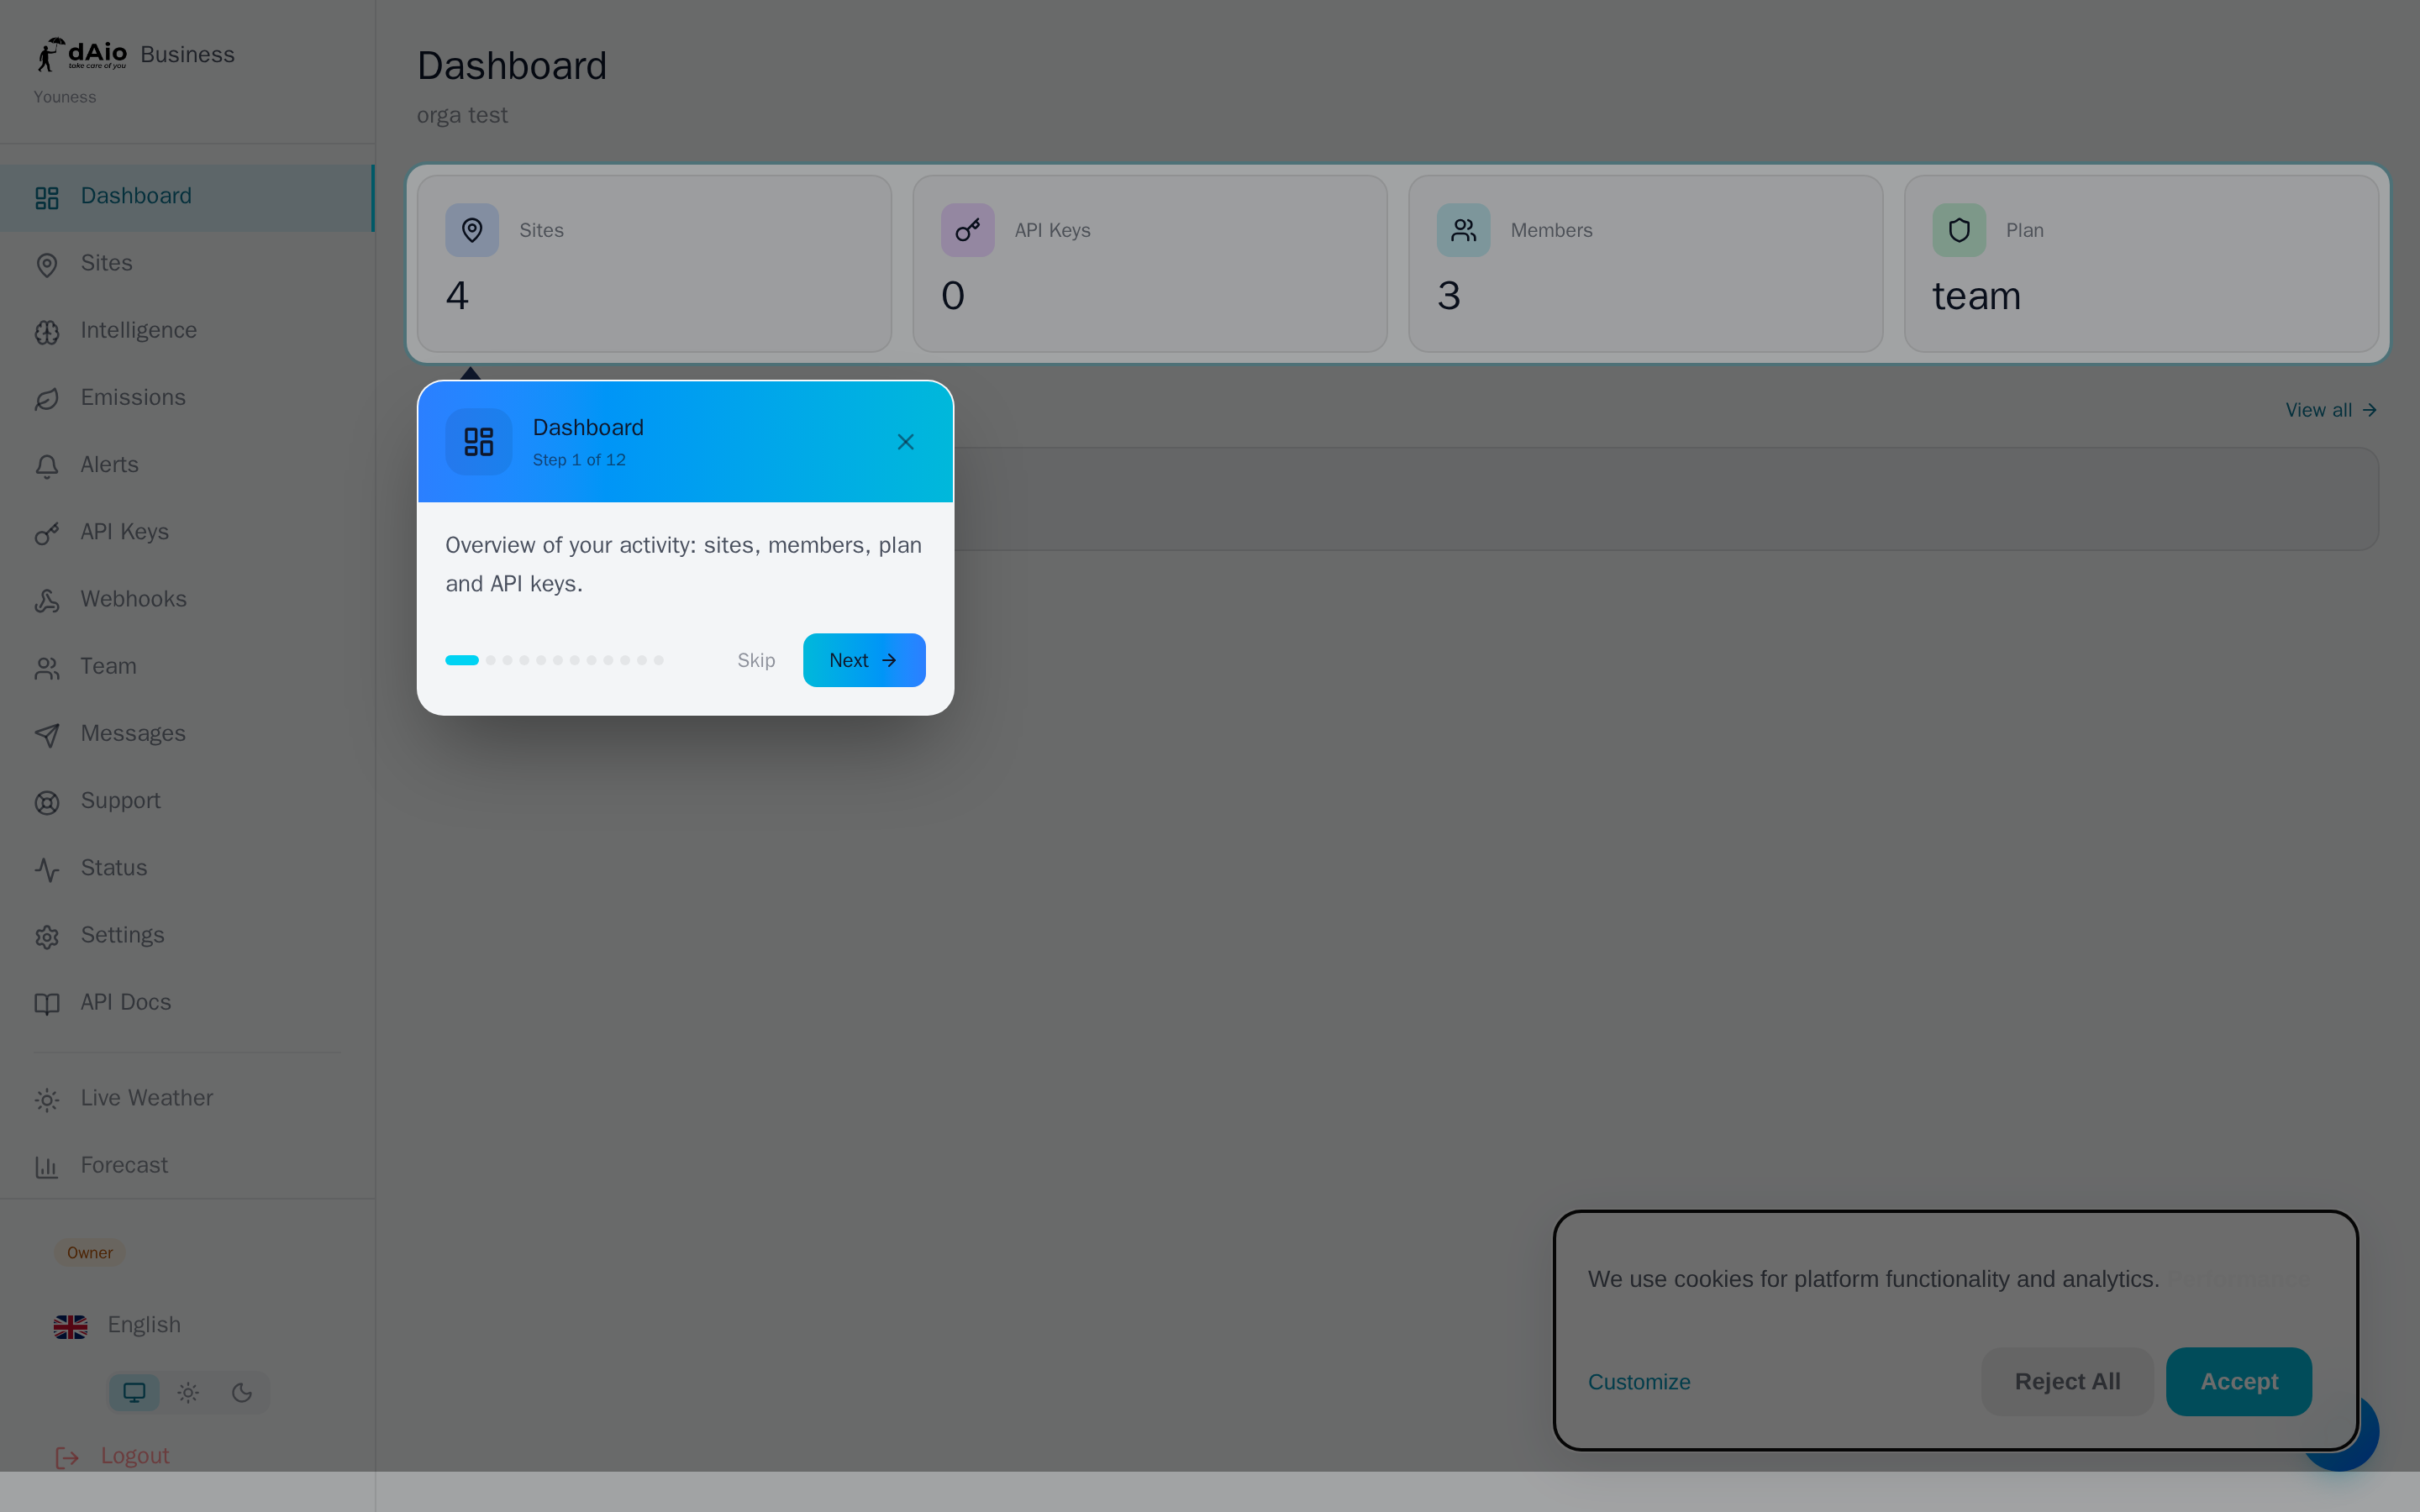
Navigation is organized around a sidebar giving access to the main sections:
- Dashboard — overview of activity and key indicators.
- Sites — management of your locations.
- Intelligence — risk scores, opportunity windows and ROI.
- Emissions — tracking and reporting of your carbon footprint.
- Alerts — predictive alerts and notifications.
- API keys and Webhooks — technical integrations.
- Team — members, roles and groups.
- Messages — multi-channel communication.
- Settings — profile, subscription and configuration.
Tip: the interface language can be changed in the settings. dAio Business is available in 20 languages.
Step 7 — Invite your team
dAio Business is designed for collaborative work. From the Team section, invite your colleagues by email and assign them a role.
Roles and permissions
| Role | Permissions |
|---|---|
| Owner | Full access: billing, subscription, team management and account deletion. |
| Admin | Management of sites, members, alerts, emissions, API keys and messages. |
| Member | View and act on the sites assigned to them; access to alerts. |
| Viewer | View only, with no modification. |
Some sections — such as Team, API keys, Webhooks and Messages — are reserved for the Owner and Admin roles.
Warning: the number of seats (active members) depends on your plan. If the limit is reached, you will need to free up a seat or upgrade your subscription. See Seat management.
dAio Business plans
dAio Business offers several plans tailored to the size and needs of your organization:
- Solo — for freelancers and small structures.
- Team — for teams needing several seats and more sites.
- Enterprise — for large organizations, with extended volumes and a service-level commitment.
The details of quotas (seats, sites, alerts, message credits, API calls) and the management of your subscription are available in Subscription.
What's next?
Your workspace is ready. To go further: